SOFTWARE TO ENHANCE CLOUDS + SKIES IN LANDSCAPE PHOTOGRAPHY
Your skies and specifically clouds can make or break your landscape photograph. In between the dreaded white skies and equally boring bald skies are the hidden clouds of overcast days. I say hidden because you really can’t see much that’s interesting in overcast clouds – and rarely does an overcast day make a dramatic photograph. But with a few trick you can make overcast days seem totally moody and wonderful.
(Now Photoshop and Luminar offer automatic sky replacement functionality where you can replace the sky in your photo with a completely different one – but sometimes you can tease out a better sky manually with additional filters and software)
Through the magic of software, you can often transform those blah landscapes into dramatic and emotive images. And think about this – if you’re on vacation somewhere exotic and the skies aren’t cooperating by creating interesting sky artifacts (or clouds!) for your shots, what are your choices? Don’t take the shot and waste an exotic location photo op, dull as it may be? Or go for it, compose well, expose well, and when you get home, magic-ify the images with software, to create those breathtaking cloud photographs that make people eyes pop right out of their heads (Now, that’s a wow shot!)
I say take the photo – there are ways to enhance the scene in post production with software tools.) See my Cloud Plopping article about basic ways to add interesting clouds to your photos.) And then there are software tools that can help you make the most of the existing skies in your photographs, to help add or even create DRAMA!

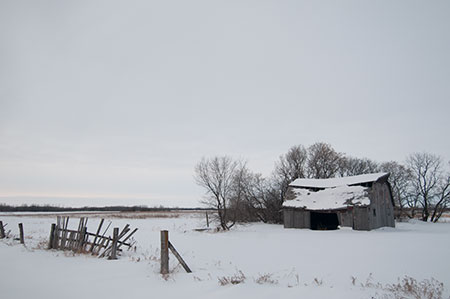
In this example,the sky is a vast expanse of flat white emptiness – almost. Flat light, no impact, really not much of anything. This might well be one of those images you delete forever. There is some drama hidden in here though. We can’t see it yet, but there is some thing wonderful happening with our sky pixels – they “see” the light that we can’t see.
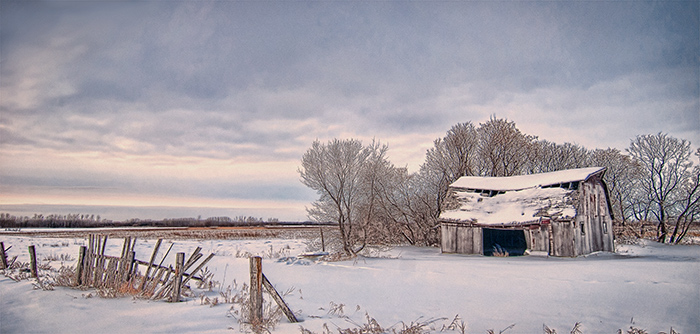
Back at the computer we can transform this image into this (below.)

Check the clouds now – oooooh! Something awesome is happening there now right? So…how did I do this? It’s too easy. To make this image I used 2 Photoshop plugins, Topaz Adjust AI, and Nik Color Efx.
THE RECIPE
Open image in Photoshop. Use Topaz Adjust using the HDR filter. Adjust the settings on the right to suit your particular image.
Your mileage will vary depending on the quality of your image – noise, exposure, et.
So play around in here with Topaz, and when you’re happy with your masterpiece, save it. Then use the Nik Software Color Efex filter called Sunshine to give the image some life!
Now, with the sunshine filter, because it makes a new layer, you can adjust the opacity of that layer to let some of the original show through – just to make it less over the top! If you have a complex image, you can even paint the sunshine effect over your image as Nik will create a mask for you and as you paint yo have full control of where the effect will be – I love that part of this plug in!
Nik Color Efex
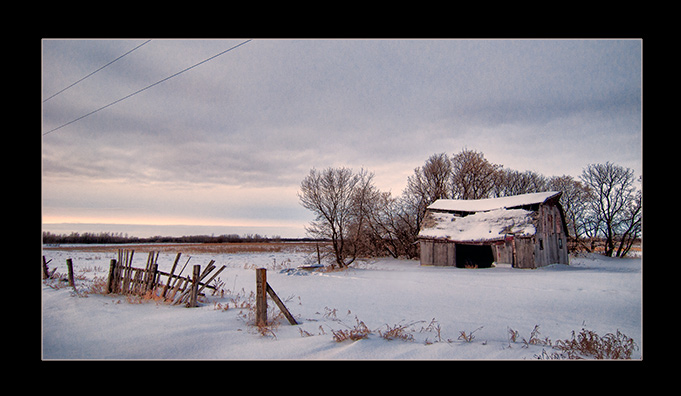
And maybe when you’re done, crop the image if needed, take care of any burning and dodging, I had to remove the ever-present telephone wires. Grrrrr!
HINT: I have found that doing these types of edits AFTER you’ve used the plugins works best. When you use the clone tool, or copy and paste pixels to hide obnoxious articles in the image – like the wires, the pixel pattern will never be exactly the same as in the original image and these 2 plugins accentuate pixels so you will end up with blotchy irregular hyper pixelated areas on your image where your edits were. Making these changes AFTER means you are using the adjusted pixels so there is nothing to accentuate.
Now you have a dreamy moody fabulous cloud filled landscape or scenic image! Give yourself a pat on the back!!! Nice shot.

